Saturday, September 29, 2018

Witches Ball

In the Spring, I created a patriotic themed frame for the summer season. 


Lady Liberty 

Now that's it's Fall , it's time to change it out.


Here's a quick tutorial to make one for your home. 

 1. Print out a black and white image that you like. I       use the thegraphicsfairy.com , almost exclusively. 
2. Cut the image or tear the image along the edges.

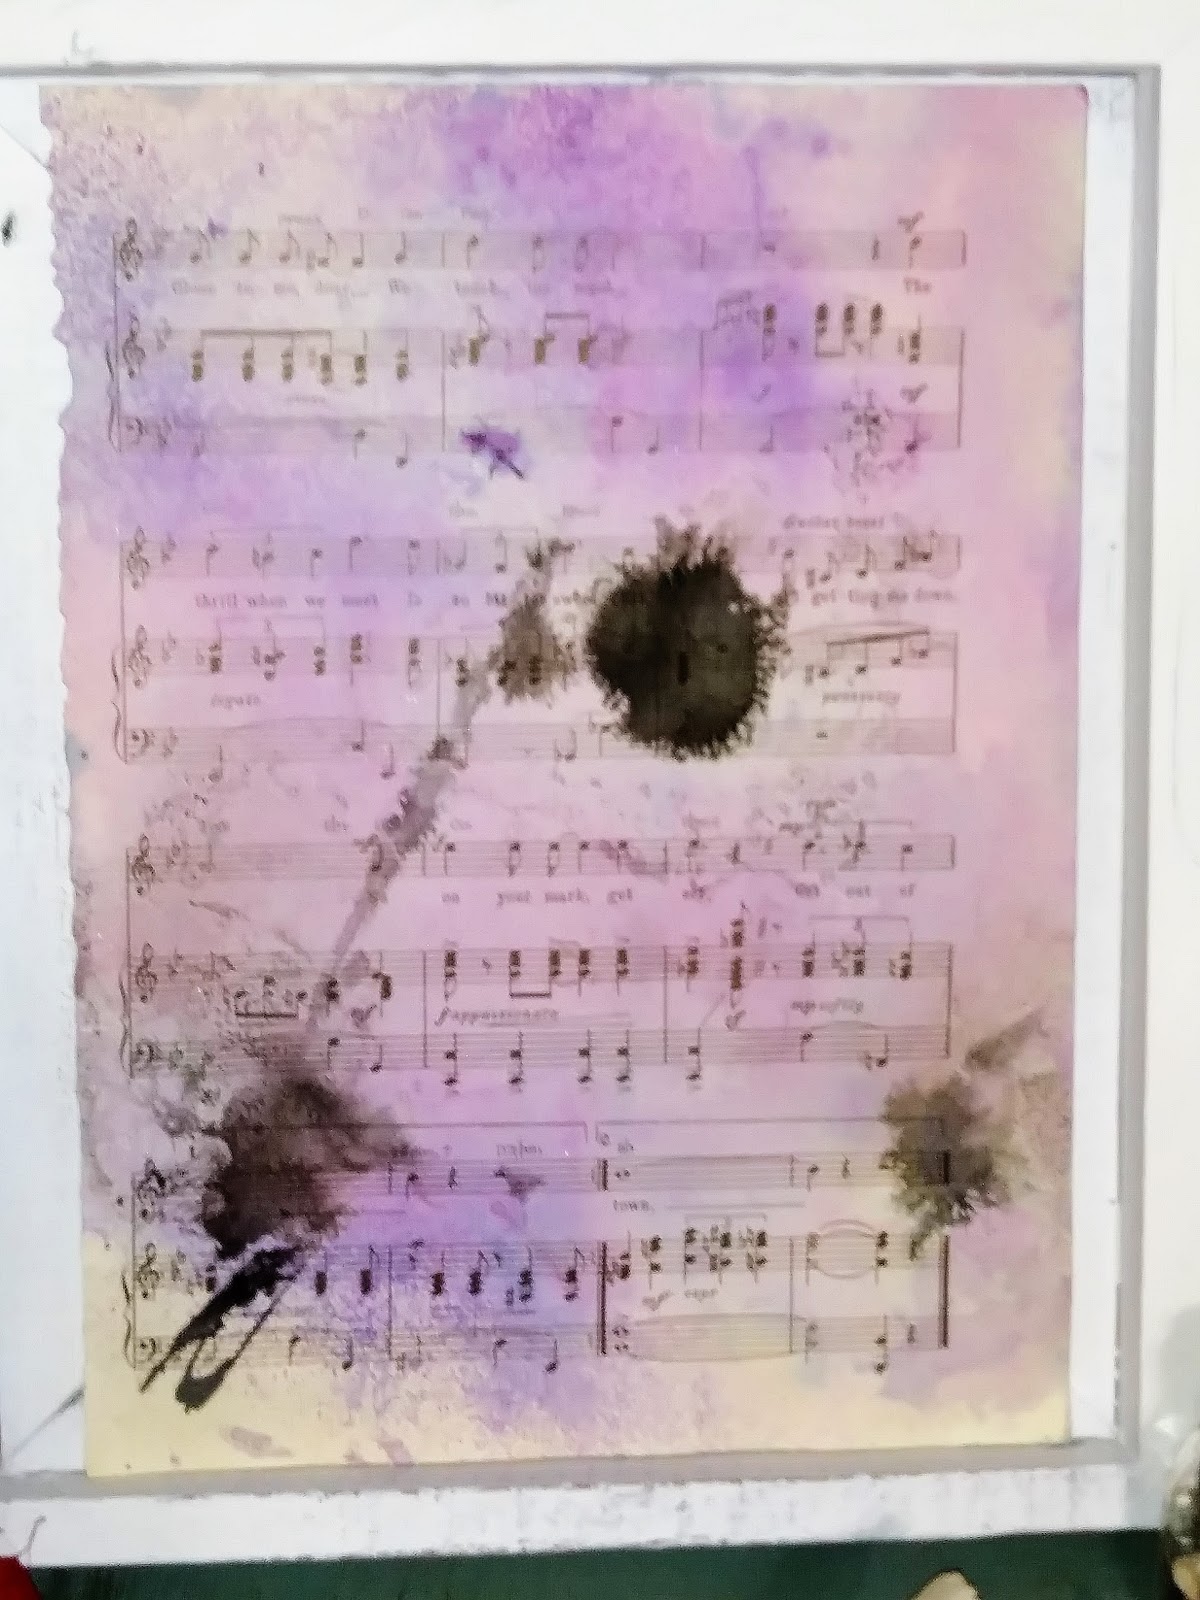
3. Create a colorful background by staining some          vintage pages with Dylusions. I used Funky                Fuschia. And then I used a few spots of black ink.      I sprayed with some water and swirled and                dripped it around the page. Let it dry. This is your      background.


So pretty.I used this background for my Be Scary Artist Trading Cards too. 

4.Now for the fun part, making Faux Vellum. This is different than what I did the last time, with my Lady Liberty. I saw Heather @Thicketworks create Faux Vellum and that's what I'm doing next. Please see her tutorial on Youtube for the best results.
 Using distress inks and a cotton make up pad I added some aging to my black and white print.

5. Apply baby oil to the entire surface. Ok, so I             didn't have baby oil, but I did have a huge bottle       of  Skin So Soft that had been neglected for the         last 4 years. I used a small artist spatula to move       it around the paper. 

 6. Make sure the entire page has absorbed the oil,         both front and back and remove all the excess           oil.  You will be flipping back and forth to remove       the excess, several times,  but in the end you will       be left with a nearly dry sheet. It will need to dry       more over the next day. 

 Experiment with other paper while you have your     tools and oil in your play space. You can see the     pages have become translucent.

7.The next day you'll spritz a few drops of water on       the images to get a few good water spots on             there.Even more aging. You'll see it better below.

8. Tear around the edges of your image. This will            give it a more aged effect.

 Look at those water spots. So perfect. Right?


9. Mount the image to the background and cut to fit       the frame. You are done. 


I think it's a good looking piece and I'm happy with the effects I achieved with the baby oil, distress inks, and water.


Have fun and let me know how you do with this project. 

Don't forget to leave me a comment below. 


With love and gratitude,

Michele


Find me partying here all week at these link parties with some great bloggers.

If you are in Myrtle Beach come on down and visit us at the Coastal Bohemian Studio or check us out on Facebook, Pinterest , Instagram, or  G+ .

Funtastic Friday #198


Let's see what ideas we find at this week's party....

Funtastic-Friday-Poster 600

FUNTASTIC FRIDAY 198 LINK PARTY


 Interested in hosting a link party? We’re always looking for bloggers to join us as party hosts. If you’re interested, get in touch with me or one of the hosts.

Meet the Funtastic Friday Party Hosts


We’d love it if you followed us on social media. 


Pumpkin Bread that is soft and delicious because it is made with vanilla and butterscotch pudding mixes and then it is drizzled with a cream cheese glaze!
Debra's Favorite & Most Viewed:  Best Pumpkin Bread from Butter With a Side of Bread

Host Picks

 Heidi's Favorite:  Black & White Check Pumpkin Pillow from Kippi at Home


DIY Painted Buffalo Check Pumpkin 
Shea's favorite:  DIY Painted Buffalo Check Pumpkin from The Red Painted Cottage

Lacie's favorite:  Mummy Wrapped Cheeseball from Desperately Seeking Gina
Sunflower Twinkie Cake
Donna's favorite:  Sunflower Twinkie Cake from My Recipe Treasures

I need to get out my art supplies and try these! Looks like so much fun to art journal. :)
Michele's favorite:  Ways to Fill Up Your Blank Art Journal from Jennie Moraitis

Learn how to make fall signs with Chalk Couture in minutes! This product makes crafting so easy! #chalkcouture #fall #pumpkin Sherry's favorite:  Fall Signs with Chalk Couture from The Country Chic Cottage


If you were featured, take a second and tweet.


If you’re linking up and joining the party, please grab a button or link back to "Building Our Hive" or one of the party hosts (copy and paste the code below the button onto your blog text tab or text widget):

Easy Peasy Pleasy


If you're a featured blogger, please grab a button to place on your blog (right click on image and save image to your computer):


Funtastic Friday Featured Blogger


All contributors who link up to the Funtastic Friday link party can join the Bloggers To Follow group board on Pinterest. Follow me on Pinterest and leave a comment below that you would like to be added.


We will also share your post on social media if sharing buttons are readily available on your post.

Help grow the Funtastic Friday Link Party.

Tweet about the party, please!


Disclaimer: By submitting a link to this blog link party, you are giving me permission to share and/or feature your blog post and image on social media and on my blog, Building Our Hive. All links shared will either link back to the blog hop (linky party) or to your blog.

Funtastic Friday #198 Link Party Rules


  1. Post as many links as you like
  2. Family friendly posts only
  3. Old posts are welcome
  4. Comments are greatly appreciated


With love and gratitude,

Michele


Find me partying here all week at these link parties with some great bloggers.

If you are in Myrtle Beach come on down and visit us at the Coastal Bohemian Studio or check us out on Facebook, Pinterest , Instagram, or  G+ .

Sunday, September 23, 2018

Artist Trading Cards " Be Scary"


Every month we have an Artist Trading Card Club mtg at the Coastal Bohemian Studio. It happens the first Wednesday of each month and the group has been continuously growing in numbers each month. 

Above is the series I created to trade within the group. I call them "Be Scary."


I started with some blank 2.5" x 3.5" cut card stock.

Next I dyed some old vintages music pages with some Dylusions Purple  and some black ink and cut those to the same size as the card stock.


Using a simple glue stick I quickly adhere the 2.5" x 3.5" music sheets to the 2.5" x 3.5" card stock. Now my base is ready. 


Next I stamped the tree in black ink onto the base and sometimes I added the tree twice to look like a grove of trees. I bought the stamps on sale at AC Moore for $1.66 each.

All of this is very low cost so far. I know you love that part. 


It seems that the low cost of making the cards, the fellowship of the Artist Trading Card Club members and the storm of creativity that bounces within the group, really has the perfect mix for these small works artists/creators.


From some Halloween card stock, I cut some bats, cats and scary jack o lanterns to embellish, again adhering with the glue stick.


The day I did this I had all of my craft stuff laid out on the table like a crazy woman and I was actively trying to destash my over abundant supply. That's when I found these. For some reason I saw a moon. Bingo. This girl has G L I T T E R!


 A quick coat of Gesso and then I use some Mod Podge to add the glitter. Hot glue these to the cards. Ideally, I would have used a small hole punch and added the pin in the same way they were sold, but I was not in the studio where all my goodies are at. 


Using the word Artist in the term,  "Artist Trading Card" , has put off quite a few, but as we continue to educate folks about the simplicity of the collage, paint and embellishment techniques, they have come to a better understanding of these little 2.5" x 3.5" crafty , little gems.


Use a black gel pen to trace around lettering and some of the embellishments. This will help them pop.


In the end, I edged the card with some gold ink from a stamp pad. 
This is fun stuff and you can see more info on ATC's aka Artist Trading Cards in these links below. I love the idea of the supplies for this as a gift, maybe for Christmas or Halloween or a birthday present for that newly budding artist in the family and so I've pulled together a few recommendations for a beginner's artist trading card kit below. 


With love and gratitude,

Michele


Beginner Artist Trading Cards Starter Kit Recommendation 


"Michele Michael is a participant in the Amazon Services LLC Associates Program, an affiliate advertising program designed to provide a means for us to earn fees by linking to Amazon.com and affiliated sites.”

Find me partying here all week at these link parties with some great bloggers.

If you are in Myrtle Beach come on down and visit us at the Coastal Bohemian Studio or check us out on Facebook, Pinterest , Instagram, or  G+ .
01 09 10