Monday, November 28, 2022

Creating Aged / Vintage #Patina Christmas Ornaments


A few weeks ago, I snagged two boxes of these glass ornaments for $2.99 ea. at the thrift store. I love things that are vintage looking and thought these would work well to create a fun base for some homemade ornaments.
 
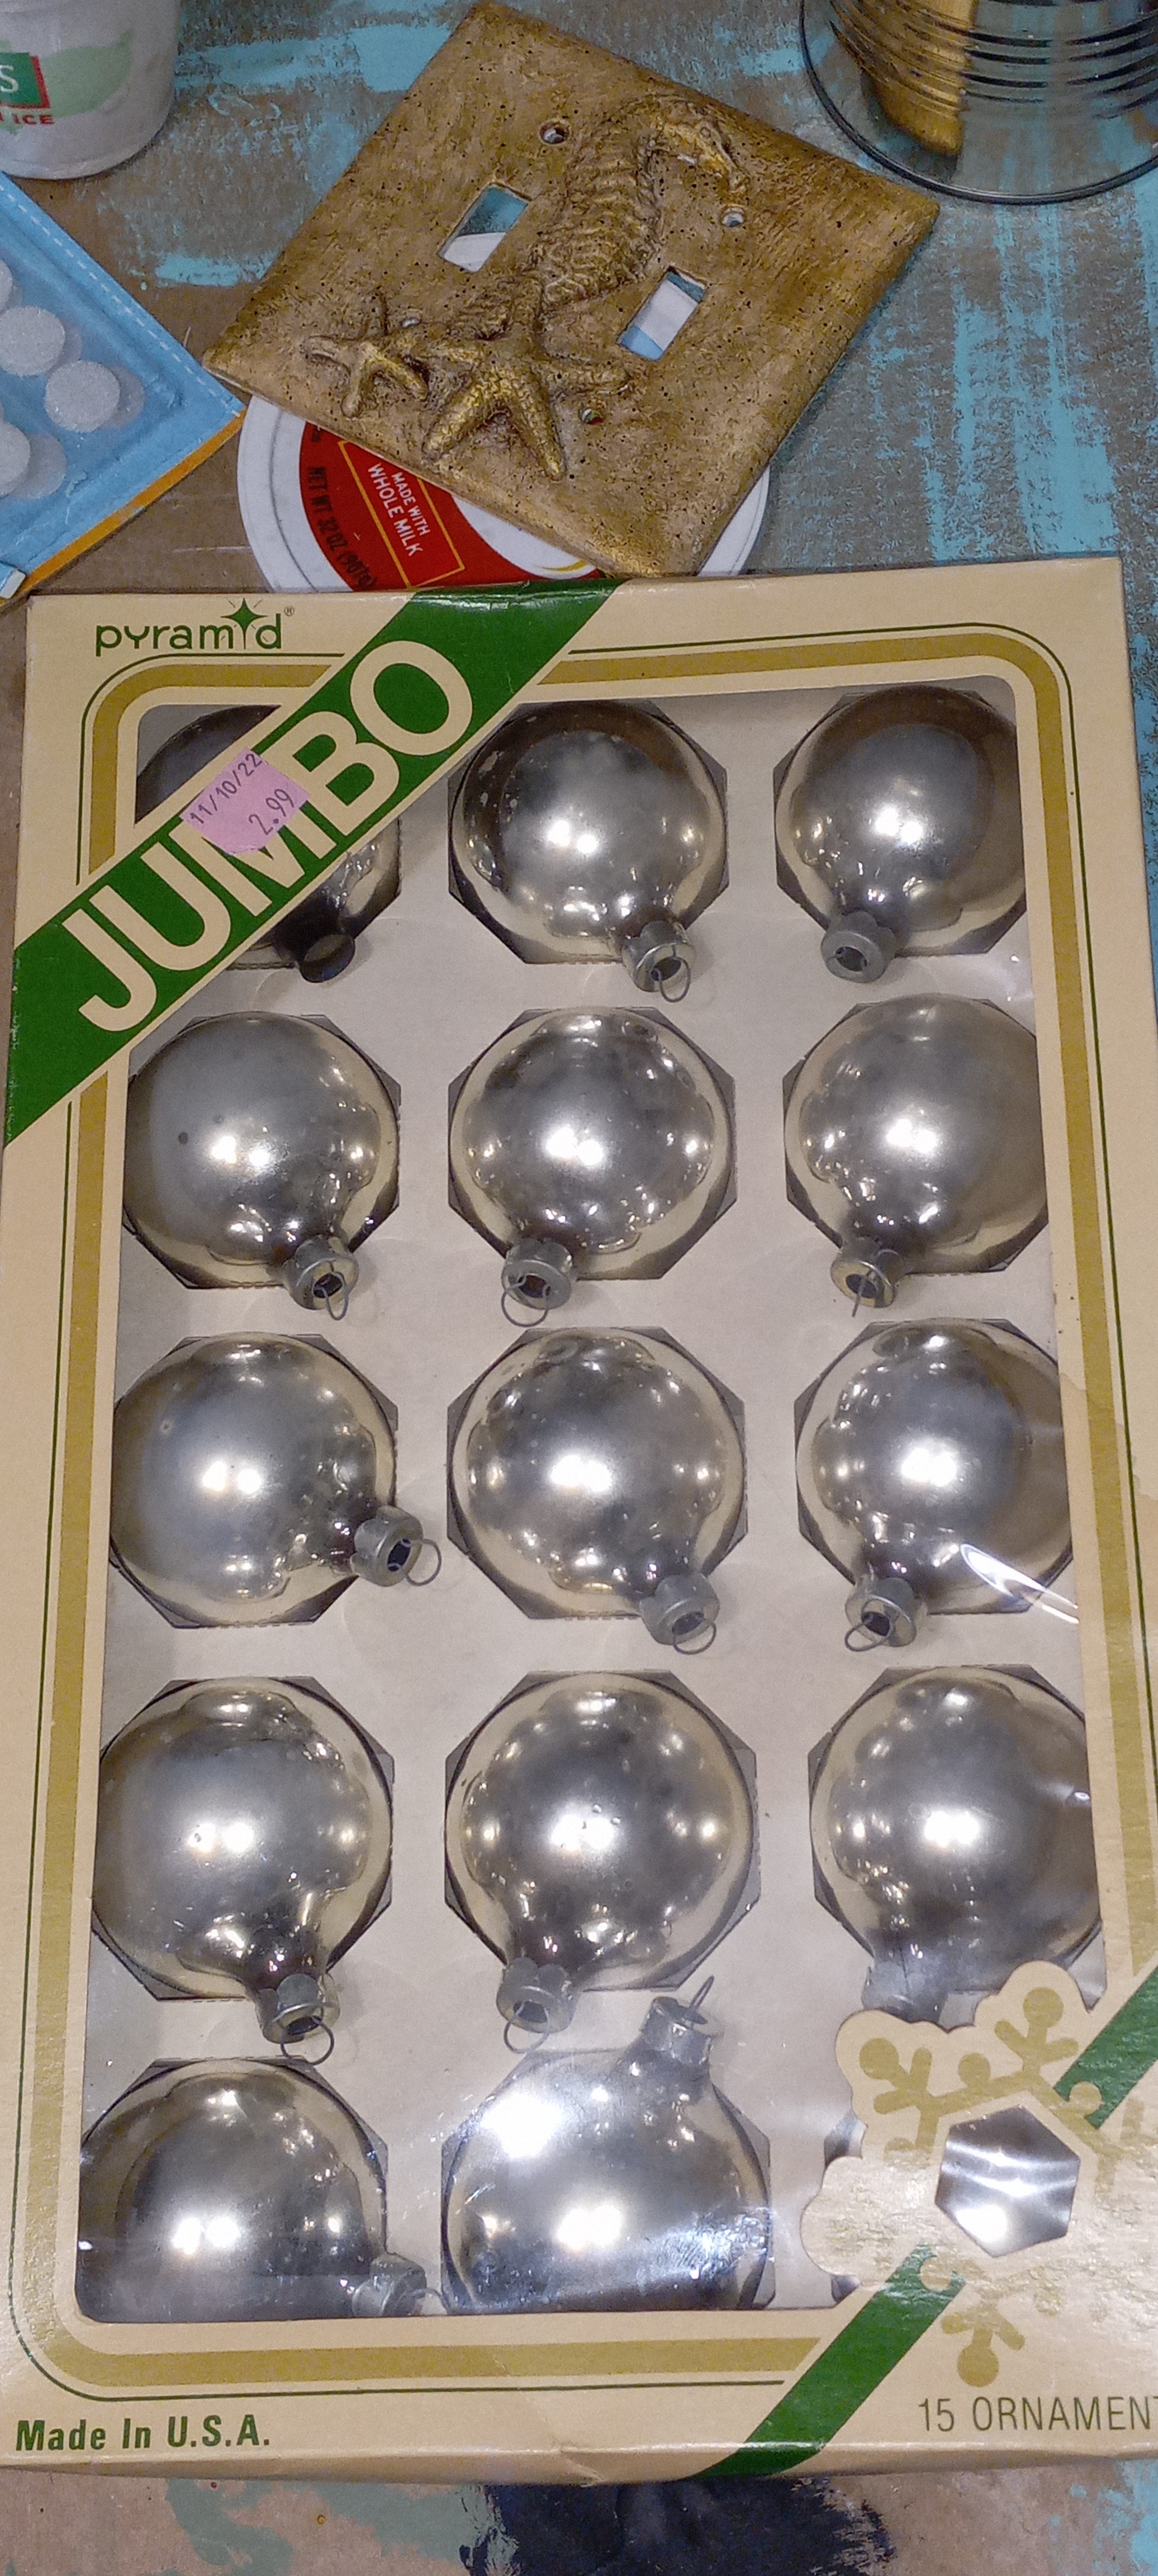
When I opened up the box, I was pleasantly surprised to see that the ornaments had become aged, tarnished ,pitted and faded...OMG...I'm in love. Although, I did like this look, I wanted something that looked more aged or even, maybe on my mind, was the look of mercury glass. I'm not sure that is what I accomplished but I love the outcome. 
I simply brushed on some watered down black acrylic paint ,
and then wiped it off in such a way as to leave a tarnished look and some markings from the terry cloth.


Additionally, I added a few flecks of black paint to help bring the look together. Watered down black paint on a tooth brush or paint brush works well for this. Shake and tap the brush to get the flecks of paint on the bulb.

I think this would look good on any shiny new bulb.

I've been tucking them here and there too.


If you love vintage and antique the way I do , you may just love the addition of these little baubles . Currently, making me happy.

Thursday, November 24, 2022

Funtastic Friday #412


Happy Thanksgiving everyone. 
Grateful to have you sharing with us each week.
Have you used any of the ideas from our posts?
Let me know below.
Now let's celebrate with some more holiday posts. 


Please follow us on Social Media!
Donna & Staci Two Chicks and A Mom
Twitter | Facebook | Pinterest | Instagram | BL|
Michele @ CoastalBohemian
|Facebook | Pinterest | Instagram | Twitter|Hometalk|
| Linkedin |BL |

Onto our Features from last week!
MOST VIEWED
Mid November Thrifting by Thrifting Wonderland 


DONNA'S PICK
Pretty Blue Christmas Tree Decorating by Calypso in the Country

ANGELA'S PICK

White Chocolate Raspberry Drizzle Cake by The Wooden Spoon Effect 


MICHELE'S PICK


Snowman in Nut Chopper by Fresh Vintage by Lisa 

HEIDI'S PICK

Gingerbread Kiss Cookies by Fat Dad Foodie 


CONGRATS TO ALL THE FEATURED BLOGGERS THIS WEEK! COPY AND PAST A BUTTON TO YOUR BLOG!


FUNTASTIC FRIDAY LINK PARTY RULES:

1. Post up to 4 links.
2. Family-friendly posts only.
3. Old posts are also welcome.
4. Comment on at least one post at the party.
5. Follow the hosts on as many platforms as you can.
We are your online friends. Let's interact, comment, and enjoy one another while supporting each other.

THANKS FOR STOPPING BY!

You are invited to the Inlinkz link party!

Click here to enter

With love and gratitude,

Michele


Find me partying here all week, at these link parties, with some great bloggers.

Follow us out on Facebook, Pinterest , Instagram, Linkedin, or Bloglovin .

Friday, November 18, 2022

Morning Glory Madness -A Photo Shoot #gardening #gardeningflorida #floridagardener #morningglories


Are these not one of the most beautiful and most beautifully colored flowers? These are Morning Glories, and they get their name because they give a big show of flowering in the morning. Later in the afternoon, the flowers fade and then they do it all over again the next day and the next, as long as they are in their blooming state.
I had been growing them for many years up in NY but then, living in a condo in Florida I had no place to grow them, until this year. 

In our new home, in Florida, I eagerly planted the seeds.

I planted quite a bit of seeds almost too late, this Spring, but none took.  Finally one little seed took and started to make a small tendril. Much of the time it was growing I doubted it would make it to bloom. 

And then it took over the gate and it was apparent this guy was going to make it but it was all vine and clearly was not going to put off any flowers.  Every day I watched for a sign that I may see a bud that would send up one big blue for me.


My Morning Glories began to bloom in late October and are still in bloom as I write this. The bloom was spectacular.


 I love these flowers soooo much I just needed to share them here with you.


With love and gratitude,

Michele


Find me partying here all week, at these link parties, with some great bloggers.

Follow us out on Facebook, Pinterest , Instagram, Linkedin, or Bloglovin .

Thursday, November 17, 2022

Funtastic Friday Link Party #411


Please follow us on Social Media!
Donna & Staci Two Chicks and A Mom
Twitter | Facebook | Pinterest | Instagram | BL|
Michele @ CoastalBohemian
|Facebook | Pinterest | Instagram | Twitter|Hometalk|
| Linkedin |BL |

Onto our Features from last week!
MOST VIEWED


PILLAR BOX BLUE TIN CAN CHRISTMAS CRAFTS

DONNA'S PICK


ANGELA'S PICK


A PROVERBS 31 WIFE APPLE TURKEY FOR THANKSGIVING

MICHELE'S PICK


HEIDI'S PICK


CONGRATS TO ALL THE FEATURED BLOGGERS THIS WEEK! COPY AND PAST A BUTTON TO YOUR BLOG!


FUNTASTIC FRIDAY LINK PARTY RULES:

1. Post up to 4 links.
2. Family-friendly posts only.
3. Old posts are also welcome.
4. Comment on at least one post at the party.
5. Follow the hosts on as many platforms as you can.
We are your online friends. Let's interact, comment, and enjoy one another while supporting each other.

THANKS FOR STOPPING BY!

You are invited to the Inlinkz link party!

Click here to enter
With love and gratitude,

Michele


Find me partying here all week, at these link parties, with some great bloggers.

Follow along on Facebook, Pinterest , Instagram, Linkedin, or Bloglovin .


Monday, November 14, 2022

Shabby Chic Door Hangers-Christmas Craft Blog Hop

Shabby Chic Holiday décor/door hangers.


Welcome to the 2022 Christmas Craft Blog Hop. 
Several bloggers came together to bring you some Christmas diy inspiration, all in one place. Be sure and click on over to see all the fun ideas we have brought to you.


Beverly | Across the Blvd


To make these decorative pieces I started with a pine tree mold and used hot glue to make the molds. The hot glue sets up within a minute and the piece can be released from the mold.
As soon as the mold is filled, I give the mold a good tap to make sure that the glue has filled in the mold completely and any air bubbles release.

To make the base, I used popsicle sticks and on others I used tongue depressors. I just lined up a few and hot glued two across the back and then did a dry brush  base coat of white.

Next, I painted the base and the trees with a dry brush of green chalk paint. I dry brushed some white on the trees to look like snow and flecked some white paint to create falling snow. 

I glued on the molds and decoupaged a few sayings. (The quotes were printed on coffee tinted paper and then coated with a spray of clear matte to keep the ink from running when decoupaged.)I glued on scraps of painters tarp for the hangers.

And of course, I added some large flake glitter to make the snow glisten. And for a Coastal Bohemian effect I added some tiny starfish toppers.


Now be sure and pop in to visit these other bloggers for more Christmas craft inspiration


With love and gratitude,

Michele


Find me partying here all week, at these link parties, with some great bloggers.


Follow us out on Facebook, Pinterest , Instagram, Linkedin, or Bloglovin .


01 09 10