Showing posts with label Recipes. Show all posts

Friday, July 11, 2025

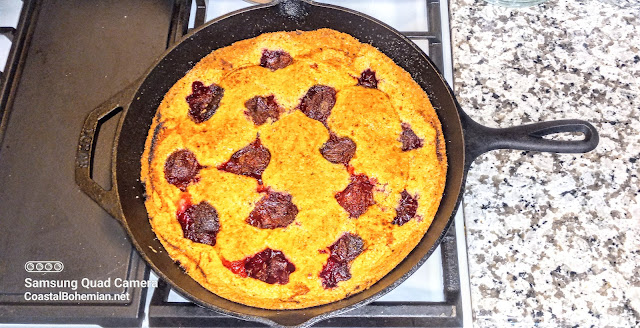
NY Times Iconic Plum Torte Recipe w/ Orange Powder


So, I've been trying to buy organic fruit wherever I can find it and that it actually looks decent . I mean the struggle is real people. Anyway, I love to make a seasonal fruity dessert with my fruits too. I hit up Pinterest and found a compilation of Plum recipes that I immediately Pinned!!!
Check out this compilation at Easy Plum Recipes by Kitchen Substitute
But this recipe stood out and it was a star dessert at my girls book club 2 weeks ago.
Before we get into the recipe let me show you my secret weapon, Orange Powder. I have been making powders with all my organic citrus peels. I have orange powder. lemon powder and lime powder. That's right no more zesting but all the flavor.
And you may want to check out this Lime Basil Cookie Recipe using Lime Powder too.


Now here are a few pics so you can see the basic s of the recipe and see that you are getting it right.

This is the thickness of the batter and you'll need to work it a bit to get it even and spread out.
Once it's spread out place the half sections of the plums on top of batter and gently press down so the batter hugs the plums.


Shockingly , you'll be adding the lemon juice over the tops of the plums where it will pool around the plums. 
Now the mix of orange powder and sugar will carmelize the top of this as it mixes with the lemon juice.


Here's the recipe from Kitchen Substitute 
marked with my changes highlighted in blue .

Ingredients

  • ½ cup (1 stick) unsalted butter, softened
  • 1 cup granulated sugar plus 1 tablespoon, divided*
  • 2 large eggs
  • 1 cup all-purpose flour
  • 1 teaspoon baking powder
  • ½ teaspoon salt
  • 6-12 plums, depending size, pitted and halved**
  • Juice from ½ lemon
  • 1 teaspoon cinnamon (I did not use cinnamon in mine because I used the orange powder in the batter and in the sugar mix topping)

Instructions

  1. Preheat the oven to 350°F and butter the inside of a 9-inch springform pan.
  2. Cream together the butter and 1 cup of sugar in a medium bowl until light and fluffy. You can use an electric mixer, but I find a wooden spoon and a little elbow grease to the job just fine.
  3. Add in the eggs, one at a time, making sure each is fully incorporated.
  4. Mix in the flour, baking powder and salt until just combined.( Here is where I added the 1 tablespoon orange powder.)
  5. Spread the batter into the pan and smooth the top.
  6. Arrange the halved plums cut-side-down, then use your fingers to gently press them into the batter.
  7. Squeeze the lemon juice over the fruit, then mix together the remaining tablespoon of sugar and cinnamon(here is where I added a tablespoon of orange powder instead of cinnamon), and sprinkle over the top.
  8. Bake for about 45 minutes to an hour, or until the cake is golden brown and a toothpick inserted into the center comes out clean.
  9. Allow the cake to cool on a rack for at least 30 minutes prior to cutting. Serve warm or at room temperature. The cake is also excellent served cold after chilling in the fridge overnight.

Notes

  • *Depending on how sweet your plums are and how sweet you like your cake, the sugar can be cut down to ¾ cup.
  • **You will use more or less plums depending on the variety and size, but also depending on your preference. I tend to use more plums for a fruitier cake, but you can always opt to use less for a cakier-cake. You can’t go wrong either way, trust me.
With love and gratitude

Michele

Find me partying here all week, at these link parties, with some great bloggers.

Follow us out on Facebook, Pinterest , Instagram, Linkedin, or Bloglovin .


Thursday, June 19, 2025

Alternative Allergy Medicine and Allergy Tea #Quercetin #Goldenrod

At around the age of , well, let's just say mid life, I realized I was allergic to cats and dogs. I have always been the type of person to stop and pet the puppies ,get down on the ground and roll around and play with them and play with the cats but I never put two and two together.  You see I would get itchy palms and then itchy skin , headaches, tired, achy, swollen eyes. I began to pay attention when I was petting , playing and rolling around with the pets. Am I allergic to pet dander?

Sure enough I was able to confirm my allergy suspicion.

So I started the whole over the counter game, trying to find an allergy pill to take when I visited with friends and family with pets. (Now , mind you I have a dog considered to be "hypo allergenic and honestly, I'm not allergic to her)


OMG, those pills are horrible. I could not function and often times my heart hurt. WTFunk?

So, I did some research and found that Quercetin was supposed to be a great way to combat allergies without medicine. 


I'm here to tell you that it has been helping me tremendously.

During my research I found that Goldenrod Flower was a way to combat allergies too. I foraged some wild organic Goldenrod Flower from a local trail. 
Again, I'm here to tell you it works amazingly well. 
Look it's even for sinus' and to clean the kidneys  but I cannot confirm that to be true.

*****Disclosure  I AM NOT A DOCTOR. You should consult your doctor and do your own research ********

I make a two cup batch of tea using two tablespoons of Goldenrod. I drink one cup hot and save the other cup in the refrigerator , to drink cold, for later in the day or for the next morning.


I'm so into the alternative solutions and am happy to have found the answer to my problems. 

I hope this helps someone else!!!!

With love and gratitude

Sunday, May 11, 2025

DIY Cutting Board Butter -Non Toxic


My husband was able to cut a piece of wood from a live oak that was removed from our property. He cut a piece, the perfect shape for a cutting board. Now I needed to find a non toxic protective finish. In my mind, something to feed the wood.

We have been on a mission to bring the healthiest ingredients into our lives. 
Most of the board butters, cutting board oils, conditioning finishes for cutting boards all seemed to include mineral oil in their recipe. No bueno! That's a petroleum based product and considered toxic. So what about a lovely, olive oil, sunflower oil, walnut oil? Why not? Right? Good idea!!!Noooooo. Because these types of oils can go rancid on the board and create a stinky situation. No bueno. 

My brain was not done. Do you get  like this? My brain is now searching it's database for info, a better way. It's there and we'll find it.
 A few years back, I made beeswax wraps and in my research I was able to find out some pretty amazing things about beeswax.
Beeswax is naturally antibacterial, antifungal, edible, waterproof, eco friendly and never goes bad. That's why beeswax wraps never harbor bacteria. I still have my beeswax wraps from two years ago although they do need a refresh.  That means a fresh coat of beeswax mix for wraps.

My brain also remembered hearing something about coconut oil having a high smoke point and long shelf life. Maybe these two ingredients can go together to make a board butter?  A little research and I found that..the high levels of lauric acid, a potent antimicrobial agent, help to extend coconut oil’s shelf life. Found at https://homediningkitchen.com/what-is-the-shelf-life-of-coconut-oil/
I mean come on, there has to be a recipe for this for cutting boards.


It took some perseverance to find this simple recipe using these 2 perfect ingredients. Thank you to Green and Frugal over at Youtube for your simple short video.


So now I want to share this recipe with you too.


Board Butter Recipe 

2 Tbsp  Beeswax
6 Tbsp Organic Extra Virgin Coconut Oil

Melt in a double boiler situation. 
(I actually used the glass jar I was  using to store the extra butter and placed it in a small pan of water. Make sure your jar is heat resistant, such as a small mason jelly jar.)
Once the ingredients melt together remove from the heat and set aside to cool. About an hour later I placed the glass jar of board butter into the refrigerator . Once it's cooled and very  solid you can remove it from the frig. 
Take about a teaspoon worth of the board butter and with your hands and just melt it all over the board. It's going to feel hard when you first take it out of the little glass jar but with the heat of your hand it will melt into the board. Let it set in for 5-10 minutes.
Now, take a soft cloth, an old tee shirt is  best, and remove all the butter that you can.Wipe all the excess off. Find a clean spot on your cloth and buff the top. You will begin to see it shine. 
Use cool water for cleaning you board. Hot water will reactivate the beeswax and the coconut oil. However, not to worry the beeswax is anti bacterial.
Plus, you can always recondition the board with your DIY stash of board butter.
Enjoy.


With love and gratitude

Michele

Find me partying here all week, at these link parties, with some great bloggers.

Follow us out on Facebook, Pinterest , Instagram, Linkedin, or Bloglovin .

Thursday, March 27, 2025

Sour Dough Starter in a Package. My Journey.

I have been so interested in the whole sour dough thing. You know it's a thing or it's not!!! You are either in the game of sour dough or not.
While out and about in SC, I came across a package of dried sour dough starter. What in the heck? 
(I see that you can get this on Amazon as well.) Photo taken from Amazon.
This company also has lots of videos to help you get started and make it easy to keep sour dough. 


I sat around on it, the package of powdered starter, for a few months, while I did my research. I was terrified to make and then destroy a sour dough starter. After a bit I found someone who said, "It's easy enough to maintain your starter by feeding it once a week."
That I could do. 
And so I began.
This post is really just a bit of encouragement to go out there and try it. 
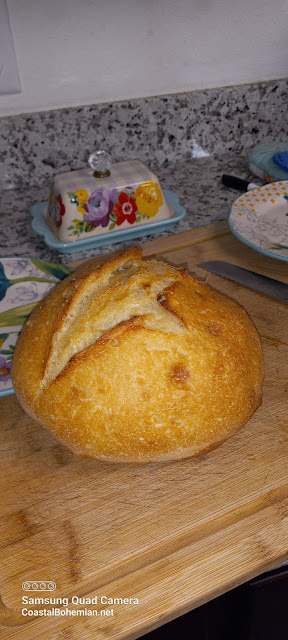
I have made focaccias from the sour dough as well several loaves of sour dough.

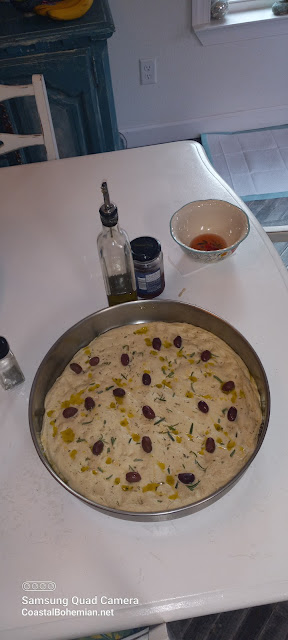
Olive and Rosemary Focaccia


 Additionally, you will keep a discard jar in the frig and there are several recipes to make with the discard. The easiest recipe for discard was a scallion pancake. Take one cup of discard and add 1 egg. Really get the egg incorporated into the discard. Add a little salt and pepper and cook in a medium cast iron pan with oil and butter. Before flipping the pancake add a generous handful of chopped scallions. Now Flip!!!
I even used the discard straight out of the discard jar , on top of a pot pie with some sesame seeds. 

Look at this scallion pancake!!!

And the top of this potpie!


I hope you give the sour dough a try. 


With love and gratitude

Michele


Find me partying here all week, at these link parties, with some great bloggers.

Follow us out on Facebook, Pinterest , Instagram, Linkedin, or Bloglovin .

Tuesday, August 6, 2024

Lime Basil Cookies w/Lime Powder

A few years ago I was searching around on Pinterest for recipes to use up my abundance of basil. I came across a recipe for Lime Basil Cookies Slice and Bake. 


Now , I would like to credit the proper blogger with this recipe, however, I have searched Pinterest, Google and YouTube to bring this recipe to you but cannot find the original recipe. 
I am going to share the recipe here and if you can claim this recipe please let me know. 
I'll share my tips, and the changes I made to adapt the recipe to my pantry.

These cookies have become my husbands favorite cookie. The depth of flavor is so interesting. The basil may seem like an odd ingredient in a sweet, but it comes off similar to a ginger, in my opinion. 


I can see a big bouquet of basil, a small tin of these cookies and this recipe as the perfect summer hostess gift. 


This summer harvest and freeze your basil in 3 chopped tbsp. servings. Use an ice cube tray for the perfect grab and go cube of basil.  You'll be making fresh basil cookies to include in your holiday cookie trays.

I use a hand mixer for these cookies, I do not keep a stand mixer in my small kitchen.

Lime Basil Cookies Exactly as I have it printed out.

Ingredients 
2 cups all purpose flour
1/2 tsp baking powder 
1/2tsp salt
2/3 cup butter
1 cup sugar
1 large egg
1 tsp vanilla extract
1 tbsp lime zest
3 tbsp chopped fresh basil 

Wash and dry the basil leaves. Finely chop them and set them aside. Sift together the flour, baking powder, and salt and set them aside. Using a stand mixer, beat together the remaining ingredients,(butter through basil), until all the ingredients are fully incorporated. Beat in the flour mixture until a firm dough forms. Turn the dough out onto plastic wrap and form into a log shape. Refrigerate for at least 1 hour or overnight. Preheat oven to 375°. Remove dough from refrigerator and slice . Place them on a parchment paper-lined baking sheet and bake for 10-15 minutes or until the cookies begin to lightly brown at the edges. Remove cookies from the oven and cool on a wire rack. Serve immediately or store in an airtight container for a week. 

These are my changes and insights: 

I make 2 logs from the recipe.
I double the recipe, make 4 logs and freeze 2 logs. 
I used 1/2 almond flour. I believe this make them more flavorful and more chewy.
I added 1/2 tsp lime juice. optional
I added 1 tbsp. homemade organic lime powder.


Turn these organic dried limes into lime powder.

And do it with organic oranges and lemons too.


And these freeze well too. 
                           Baking with basil. Have fun. 


With love and gratitude

Michele

Find me partying here all week, at these link parties, with some great bloggers.

Follow us out on Facebook, Pinterest , Instagram, Linkedin, or Bloglovin .
01 09 10