Welcome to Funtastic Friday Link Party #404
Read along to see what bloggers around the world post every week.
Join the party by linking your blog below.
.png)

!

Please follow us on Social Media!
Donna & Staci @ Two Chicks and A Mom
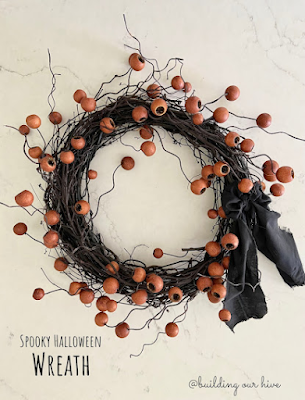
Heidi @Building Our Hive
Featured links from last week...
MOST VIEWED
Pecan Pie Cookie Cups by Walking on Sunshine Recipes

MICHELE'S PICK

Black Widows on the Tablescape by Whispers of the Heart

ANGELA'S PICK

HEIDI'S PICK

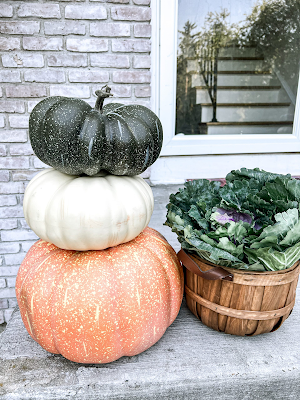
How to Make a DIY Pumpkin Bushel Basket by Creatively Beth
CONGRATULATIONS TO OUR FEATURED BLOGGERS--GIVE YOURSELF A HIGH FIVE AND A "FEATURED" BUTTON!

FUNTASTIC FRIDAY LINK PARTY RULES:
1. Post up to 4 links.
2. Family-friendly posts only.
3. Old posts are also welcome.
4. Comment on at least one post at the party.
5. Follow the hosts on as many platforms as you can.
We are your online friends. Let's interact, comment, and enjoy one another while supporting each other.
THANKS FOR STOPPING BY!
With love and gratitude,
Michele

Find me partying here all week, at these link parties, with some great bloggers.
Follow us out on Facebook, Pinterest , Instagram, Linkedin, or Bloglovin .