Showing posts with label crafts. home decor. Show all posts

Thursday, August 9, 2018

Rose Table


This is a little half moon side table I rescued from the side of the road.

 It looked like this before I worked some magic on  it.
1.Some Crisp Collar Chalk Country Paint in a quick , almost dry brush coat. 
2. A little machine sanding to get the distressing just right.
3. A coat of clear wax.


There were these obvious buts of ugliness that needed some help 


 I decided to use these absolutely beautiful clay roses I made, especially for using in my furniture painting and upcycling.
 Learn to make these simple PaperClay Roses here.


 These are easy to adhere using wood glue . I use Gorilla Glue.


This looks very simple and clean, even a bit beach shabby.
It's a happy piece.


With love and gratitude,

Michele


Find me partying here all week at these link parties with some great bloggers.

If you are in Myrtle Beach come on down and visit us at the Coastal Bohemian Studio or check us out on Facebook, Pinterest , Instagram, or  G+ .

Sunday, June 17, 2018

Stay Vintage for my Son


My son is in the business of antiques and collectibles. I think I planted the bug when I dragged him around to garage sales on weekends when he was a little boy. The thing is he always loved it. He learned how to negotiate price at a very young age. One time I ran a yard sale fundraiser for our school's garden club to raise money for sprinklers. My son was 10 yrs old at the time. That day I sent everyone to him for pricing, I trusted him implicitly. That was a defining moment if you ask me. The vintage soul had been awakened.
When he was 21 and deciding what he wanted to do for a living I sat him down, looked him in the eye and said, "What do you love to do?" 
His response,  "I love buying and selling antiques and collectibles . I could do that all day." At this point he and his father and Uncle were very heavily into buying and selling antiques and collectibles.
Bingo.
He's 29 this year and owns two antique and collectibles locations, runs auctions, travels around the country buying and selling and he has some of the top buyers and sellers in the country in his database.


This craft is for my son, Wally.

He has a t-shirt I love that says Stay Vintage printed on the front. So perfect. 
I was inspired by that, for this small framed art project.

I cut some patches of canvas cloth and stamped them with a teal blue permanent ink from StazOn


Then I ironed them flat. I also pulled the strings out from along the edges of the patch to create a weathered, shabby look, like maybe  I had found these old frayed pieces as scraps just as they were.

I chose a square frame from a bunch of old frames hanging around the studio waiting for a new life and then set my patches inside a vintage page.
I used some Fabric Fusion to set the patches in place.
And set it into the frame.
 I really had fun making this and can't wait to gift this to my son. Thanks for reading along.
Happy Father's Day 
My son's Father has passed away and I know he would be very proud of him today.
If you'd like to show Wally the love, make sure to like up his page at  Wally's World on FB by clicking here.


With love and gratitude,

Michele


Find me partying here all week at these link parties with some great bloggers.

If you are in Myrtle Beach come on down and visit us at the Coastal Bohemian Studio or check us out on Facebook, Pinterest , Instagram, or  G+ .

Wednesday, June 13, 2018

Seahorse Mail Holder

This month I join my talented blogging friends in a Dollar Store Craft Challenge
I found a seahorse beach toy and used it as the star for an upcycled mail holder. I know my coastal, beachy, nautical friends will appreciate. 


It's a thrill to create something at a small price that looks or feels more expensive. I also hope it inspires others to do the same. 


Strolling the aisles of the Dollar Store on a hunt for my next project/challenge, I found these seahorse pool toys. Hmmmmm. What can I do with these? 
Well, actually the grating in the middle sort of makes them  look like metal. 
Let's go home and spray these up like metal and see what we can come up with ?And by we, I totally mean ME.


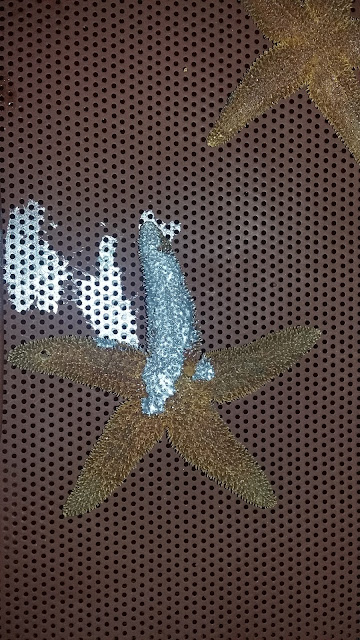
You can see how cute they are laid out waiting to be primed and painted. I used some grey primer I had around the house and the Rustoleum 
 Metallic in Silver. On the plastic it gives a more galvanized look and that was really what I was looking for here.

Yes, now this is what I'm looking for, but what next? 

How about if I use it for an embellishment for my acrylic pour canvas. I've been staring at that canvas for a few months now and saying" You need a little something."


Cute but no , that's not it. 
Oh, but what about on a driftwood wreath? That could be to die for!
No, and I say that after I laid the wreath out with several seahorses. 
What about on all the doors in the house? OMG that would look soooo unique. And it would make me happy everyday to see that. 
No. Pretty, but no.

If I wait for it the answer will come. It always does. It's one of the things I teach my students in my Upcycling Class at my studio. Sometimes you have to put things down and walk away and wait for the answer. Maybe leave the project out where you can see it . 

Now the truth is at this point I'm thinking and seeing something more galvanized and metal. 
 I thought......galvanized planter? 
Chicken wire? What ?

As I was cleaning up the back closet of the condo, I found this mail holder and knew somehow they were connected and they were going to have a new life together.

My immediate thought was to paint it silver tone or to make both pieces look weathered and rusty. In the end I painted everything the same color.
I painted up the mail holder and the starfish and glued everyone on with a hot glue gun.

With the addition of a few painted starfish I saw something that felt more cohesive.


I hope you enjoyed this challenge. 


I did have one more idea for the seahorse....I thought he would be great on a stick in the garden. Garden stake!

Feel free to leave me an idea for my painted seahorses. I have 6 more  waiting to be used for something.

With love and gratitude,

Michele


Find me partying here all week at these link parties with some great bloggers.

If you are in Myrtle Beach come on down and visit us at the Coastal Bohemian Studio or check us out on Facebook, Pinterest , Instagram, or  G+ .

Sunday, April 8, 2018

Nautical Serving Tray #Upcycle

When we first arrived at our completely  furnished, new to us , condo, we had a lot of things to change and discard. I couldn't part with this ugly black serving tray with a chef and several bottles of wine printed on the face. (Sorry,  I can't find my before pics.)To me , it was ugly but I knew I could use the tray around the condo, so I did a quick upcycle.
First a quick coat of Crisp Collar by Chalked Country Paint 
A little sanding to distress and a coat of clear wax help bring the tray to a much softer place.
Next, I decoupaged using beautiful nautical napkins. When you do this be sure and pull away the second layer of the napkin, the backing. 

 I needed more than one napkin to take up the square footage of the inside of the tray . I cut a piece to fill in the gap but once I added the second napkin piece I could see a line distinctly bewteen the two napkins.  You can tear or cut a few images from another napkin and randomly decoupage these to the tray to help create a more cohesive look.


If you get a little tear while adding your Mod Podge you can cover it right up with a patch of napkin . 


 I used a final coat of Gloss Mod Podge all over the face of the tray.


Very simple and a perfect fit .
If you see an old serving tray don't throw it away. There are many ways to upcycle a serving tray. 


With love and gratitude,
Michele
Coastal Bohemian

Find me partying here all week at these link parties with some great bloggers. If you are in Myrtle Beach come on down and visit us at the Coastal Bohemian Studio or check us out on Facebook, Pinterest , Instagram, or  G+ .

Saturday, March 24, 2018

Giant Mixed Media

We have been redoing our condo in Florida on Okaloosa Island for the past few months. 
As an upcycler,  I try to repurpose as much as possible and of course, gift the other stuff to Goodwill.
There was a very big print in a great frame hanging in the condo when we first bought it, but the print was not our style so I decided I could paint right over it and create a mixed media project.

 I have never taken on a mixed media project this large and I will tell you it took a lot for me to come back to it time and time again, until I made it feel cohesive and expressive of what I wanted. 

The size is 43" H x 53" W
This is the only before picture I could find . I know it's blurry but I wanted you to have a small idea of what it was before. In this picture I had already given the frame a coat of white paint.


This is the finished piece.
I started out with a piece of fabric that was printed with maps, a burlap scrap, some paints, the wooden  "fishing" cutout, stencils,vintage sheet music pages and a fish print.
This was a total craft destash. 


This is similar to what the fish print originally looked like, meaning it was black ink printed on brown paper. I mention this because it gave me the most grief and taught me the most about not giving up, walking away and thinking outside of my traditional thoughts. It challenged me to come back with fresh ideas. It was scary and thrilling all at the same time. 
       (Yes, I actually printed the fish and we did eat the fish.) 


Understand there is not much of a plan when doing mixed media. The only plan I had was to showcase my fish print.


I began by rolling on some white paint.
Next, I added some teals and gold acrylic paints using chip brushes. I randomly added sheet music,the map fabric and the burlap scrap with Mod Podge.
On top of all this I  began a series of stenciling abstract images , brush strokes, paint dripping, and speckling  to begin to tone everything down and bring them in to one another.


While I was standing back drying my clean hands and pondering my next move I had a flash of mixed media genius. I twisted my paper towel,(drying my hands), into a hook and added it to the picture with some Mod Podge.

I began to look for items to bring the piece together and decided on some seashells and this little scrap of wood I thought I could make into a sign. In the right corner you can see the "Beach " sign. 

After that , I stenciled "Shelling" and "Okaloosa Island" onto the piece. 

All the while, in the center is this fish print on the brown paper and I can't for the life of me think of how I can work this piece to bring it into the mix.
                               (Not the actual fish print)

I had been playing with clay molds and decided to hot glued some of these around the fish print , hoping to soften the hard edges of the print and then I dry brushed them as well.  I also played with the drizzled hot glue method. See right corner of fish print here.


That's when it got dangerous...I watered down some sand colored paint and washed right over the fish print. Whhhaaaaatttt?????
I love this fish print and I was worried that I would make the ink run and lose the image or who knows what happens now but I know inside me at this point, this moment is important. I needed to be dangerous, wild and harness a little Jackson Pollack madness and maybe make some mistakes. Maybe if I make a mistake I can also learn to work with it....which is what I ALWAYS teach my students down at the  Coastal Bohemian Studio. Picture me with big dramatic arms telling you that aha moment.
I want the students to be fearless or at least notice the fear but to push through it and here I am the Queen of Fear , right now.

Now that I have the washed out image I'm feeling  like I can get somewhere. As you can see above, I just began to highlight some of the print to bring it back a bit.I also added some funky stencil to the fins.

My final block was an open area in the image that seemed to separate the top from the bottom.


Hmmm...I hot glued a clay fish, stenciled Crab Island and 
finally I added lengths of stencil from top to bottom and it began to look like sea kelp to me,so I kept it up. 
Using the same stencil, I added a border around the painting and suddenly, it felt right. I actually love it.


Here's what is fascinating about creating mixed media for me, there was no real plan and yet it completely tells a story about our condo. The story I see is ...
 Artsy, Beach Bungalow Style Okaloosa Island Condo, where Coastal Bohemians walk outside to fish on the white sandy beaches, along the blue green waters of the Florida Panhandle. There's shelling and it's close to Crab Island.

How did that happen from a craft destash?

 Here's a link to our Okaloosa Condo . We are waiting to get some professional pics but you'll see it's a #CoastalBohemian paradise.


Thanks for coming along on my artful inner journey. 

Don't be afraid to get out your art journal and go on a journey. Who knows where it will take you?


With love and gratitude
Michele
Coastal Bohemian

Here's a link to where I party all week.
If you are in Myrtle Beach come on down and visit us at the Coastal Bohemian Studio or check us out on Facebook, Pinterest , Instagram, or  G+ .
01 09 10