Thursday, January 13, 2022

Funtastic Friday Link Party#366

Your Hosts
Please follow us on Social Media!
Donna@ Two Chicks and A Mom
FEATURES FROM LAST WEEK'S FF LINK PARTY
MOST VIEWED AND MICHELE'S PICK
coo fabric heart crafts
ANGELA'S PICK
HEIDI'S PICK
A bowl filled with homemade chicken and barley soup
FLOUR ON MY FACE INSTANT POT CHICKEN BARLEY SOUP
DONNA'S PICK
Stack of Valentine's Day Swirl Cookies
WALKING ON SUNSHINE RECIPES VALENTINE'S DAY SWIRL COOKIES
CONGRATULATIONS TO OUR FEATURED BLOGGERS!
FUNTASTIC FRIDAY LINK PARTY RULES:
. Post up to 4 links.
2. Family-friendly posts only.
3. Old posts are also welcome.
4. Comment on at least one post at the party.
5. Follow the hosts on as many platforms as you can.
We are your online friends. Let's interact, comment, and enjoy one another while supporting each other.
THANKS FOR STOPPING BY!

You are invited to the Inlinkz link party!

Click here to enter


With love and gratitude,


Michele


Find me partying here all week, at these link parties, with some great bloggers.

Follow us out on Facebook, Pinterest , Instagram, Linkedin, or Bloglovin .

Valentine Porch Sign # Valentine #ValentinesDay #


Last year, I started working on a Valentine's Day porch sign that I never completed.
 So, this year I completed it. You know how it goes.
I want to explain that I almost never have a plan and never know where design and art will take me so it's certainly interesting when you realize what happens along the way. 
                                                        💗
It started with a white background and then a wash of a pinkish purple color. The white was chalk paint and the wash was a blend of some craft acrylics.


At this point I have no further plan ....no words, no saying, nothing, nada.
💗
I thought a floral background would be pretty for Valentine's Day and so I loaded up a palette of craft paints and decided to try something I saw on Pinterest or Youtube. 
Using paints , you blend colors and create smudges , using a partially blown up balloon. The smudges will eventually become doodle flowers. In this case, I know I can pull off a rose, so here is some of that process.


You see how easy it is to dip the balloon into the paint and get a mix of colors on there that really create a pretty, colorful background for the flowers.

A good idea is to practice on some paper.


I used a very thin paint brush with a juicy(watery) amount of paint. Be sure and offload some of that juicy paint.  You still want the paint to flow easily from the brush very fluidly to create the outlines for the flowers or in this case the roses. I'm not big on explaining in detail how to paint so I will tell you to head on over to Youtube for some tutorials. This flower painting, for me, goes back to crafting in my 20's.
This feels happy.


💗

And now that's it , for a whole year. Nothing, and then packed away. 💗
This year, I added some lacey stencil work to the corners and I stencilled on the words Lovers Lane .


In the end, I used a very dry stencil brush to add some shadowing around the entire piece. In my mind this helped set the Lovers Lane front and center creating a vignette.


It's a cheerful way to come home and perfect for celebrating my upcoming 1 yr wedding anniversary. 

With love and gratitude,

Michele


Find me partying here all week, at these link parties, with some great bloggers.

Follow us out on Facebook, Pinterest , Instagram, Linkedin, or Bloglovin .

Monday, January 10, 2022

#ChalkPainted Bottles and Cans for Valentine's Day


This post is part of a  Valentine's Day Craft Challenge that is a collaboration with several other bloggers. Be sure and stop by and visit the other bloggers for more holiday inspiration.


Years ago, I taught a painted bottle class in my art studio. I used #chalkpaint and bottles  because I could teach people how easy it was to work with chalk paint , which I sold. Everyone would go home with an inexpensive, little take away. 


Depending on the month of the year, I always had the perfect color #chalkpaint and coordinating vintage images from the #Graphicsfairy.


After the bottles were painted and the images decoupaged I would break out the findings and trims. This was a collection of old jewelry pieces, seashells, twine, pieces of lace and trim. 

 It was so much fun to see peoples' imaginations go wild with ideas for embellishments.

I have recently moved and I am looking to reopen my art studio in Gulf Breeze, Florida. In doing so, I am going to visit local businesses and organizations to see how we can work together. I like to leave a little crafty calling card and these bottles and cans make it inexpensive for me to do so. 
💗
Here's what I did to put together this collection. 
1. Gather up a few bottles and cans in assorted sizes.
2. Clean thoroughly.
3. Remove all the labels.
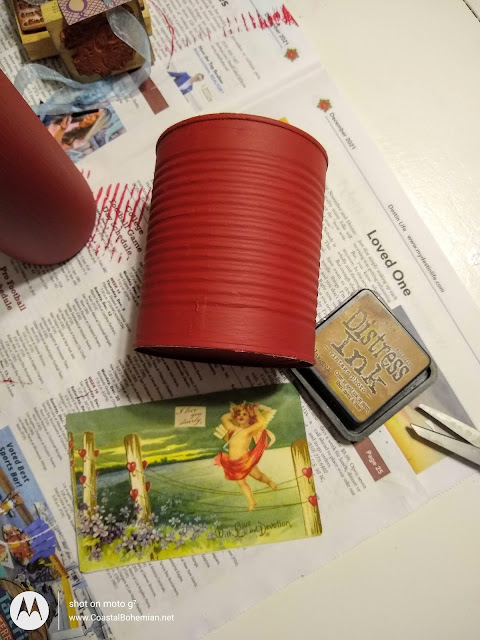
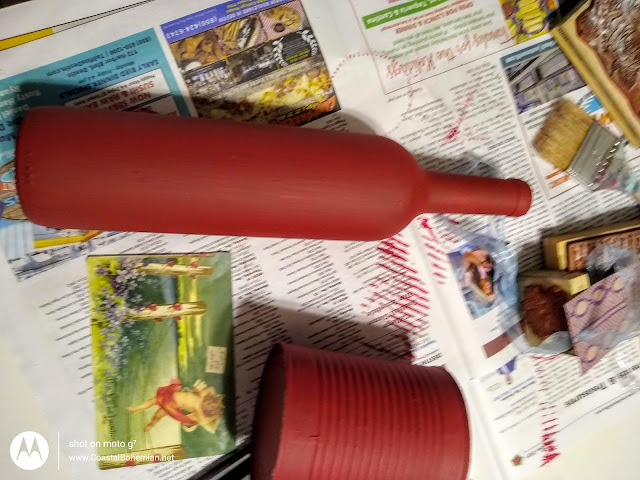
4. Paint with chalk paint and allow to dry.


Note- I made textured paint for a few pieces. This is a mix of 1/2 cup of chalk paint with 1 rounded tablespoon of baking soda.

5. Coat w/ clear or dark wax.
6. Remove excess wax and buff.
💗
7. Distress vintage images.
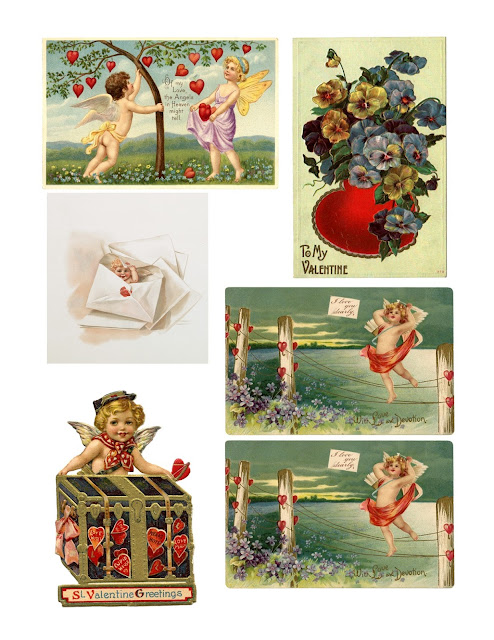
Here's a variety of images for you to print. Just rt click on the image and save. You should be able to easily print these at home.


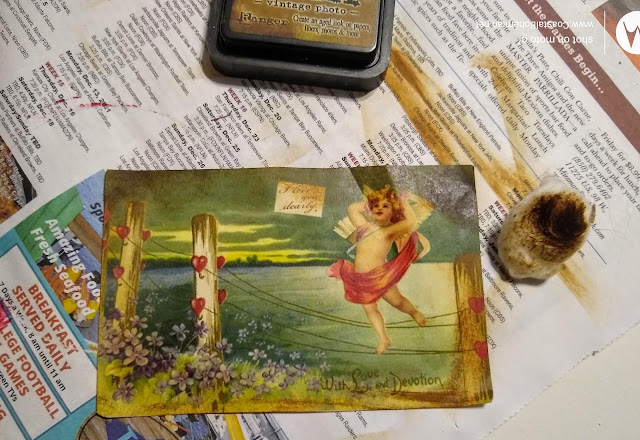
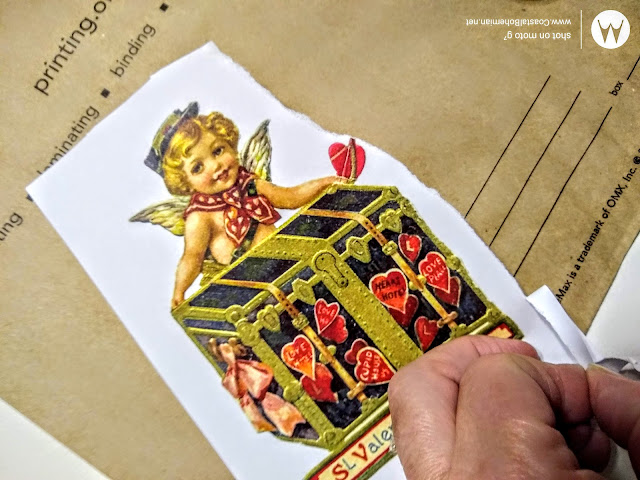
I like to tear around images to further distress, then I add some dark wax or brown ink around the edges either using a brush or in this case, I used a cotton ball to add dark brown ink around the edges.
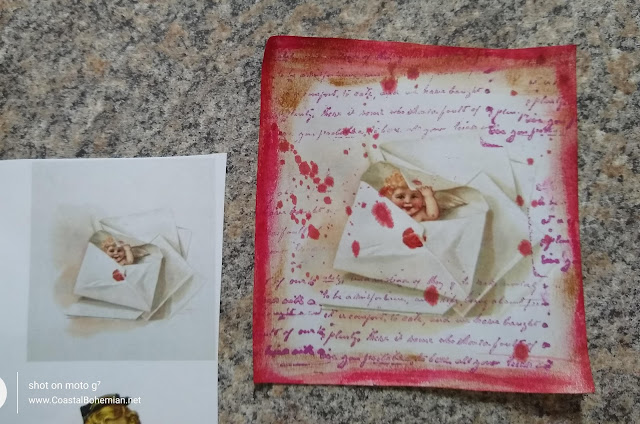
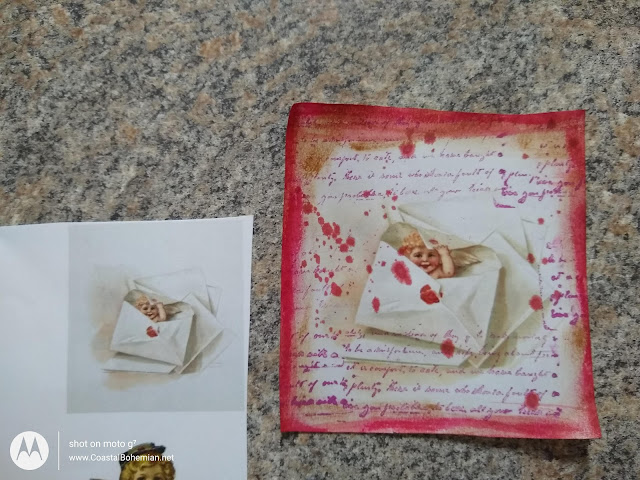
This label was distressed using dark ink applied to the edges, it was splattered with some pink ink , stamped with wording using a fuschia colored permanent ink, and softened around the edges with red pastel smudges.
Look at the before and after of this image. 
💗
8. Decoupage vintage images to bottles or cans.

Pro tip- Use a piece of plastic wrap to help adhere your decoupage image to the bottle. Here's how it works. Flip your image over and coat the back with mod podge. Position it and place it on the bottle. Quickly grab the plastic wrap and place it over the image on the bottle. Carefully smooth the image into place using your fingers patting and smoothing gently. This helps to avoid tears in the paper. Be careful not to pick up any glue and get it on to the front of the image. You'll see that you can easy smooth most wrinkles using this method.
💗
9. Embellish using shiny bits, laces and trims.


💗

Gathered together these would make a perfect grouping . The display is colorful and happy. It looks a little artsy and  with the mix of textures and variety, is truly eye  candy.


How sweet to make a few to start  your seeds.

Remember to click over to visit the other Valentine blog posts.


With love and gratitude,

Michele


Find me partying here all week, at these link parties, with some great bloggers.

Follow us out on Facebook, Pinterest , Instagram, Linkedin, or Bloglovin .

Thursday, January 6, 2022

Funtastic Friday #366


Your Hosts


Please follow us on Social Media!
Donna@ Two Chicks and A Mom
| Twitter | Facebook | Pinterest | Instagram | BL|
Michele @ CoastalBohemian
|Facebook | Pinterest | Instagram | Twitter|Hometalk|
| Linkedin |BL |

FEATURES FROM LAST WEEK'S FF LINK PARTY

MOST VIEWED AND ANGELA'S PICK


HOWLING AT THE MOON LARGE WRAPPING SHAWL

HEIDI'S PICK


ARTFUL HOMEMAKING HOW TO ORGANIZE RECIPES

MICHELE'S PICK


MAKEABLE CRAFTS HOW TO MAKE FABRIC-COVERED JOURNALS

DONNA'S PICK


HOMEMADE ON A WEEKNIGHT CRISPY CHEESY CHICKEN TACOS 


CONGRATULATIONS TO OUR FEATURED BLOGGERS!


FUNTASTIC FRIDAY LINK PARTY RULES:
. Post up to 4 links.
2. Family-friendly posts only.
3. Old posts are also welcome.
4. Comment on at least one post at the party.
5. Follow the hosts on as many platforms as you can.
We are your online friends. Let's interact, comment, and enjoy one another while supporting each other.
THANKS FOR STOPPING BY!

You are invited to the Inlinkz link party!

Click here to enter


With love and gratitude,


Michele


Find me partying here all week, at these link parties, with some great bloggers.

Follow us out on Facebook, Pinterest , Instagram, Linkedin, or Bloglovin .
01 09 10