Monday, November 27, 2017

Holly Jolly Gift Tags

Tis the season to be jolly, Holly Jolly.


We decided to have a diy Christmas gift tag class at the studio in December as a way to bring in more interest for mixed media.

After talking about it, I felt inspired to make a few of my own tags to showcase some examples for the attendees.

The thing is, I'm in NY and I don't have the resources I do at the art studio. Hmmmm.

I almost always travel with an overstuffed craft carry case. With some rummaging I could possibly come up with something.


I pulled out some Apple Barrel Barn Red and 
Red Apple.

I did run over to Walmart and buy some plain brown  tags.


I had no real plan here and just swiped on one color at the bottom and one on the top. Next I cut a heart shape from a piece of paper and used it as a stencil to begin to add some background and some texture. 


Next I sponged on some gold paint to try and bring it all together and it worked. 


Yes, I keep these little sponges in my travel craft kit.They help add color quickly and easily.

Now, I knew I wanted to print out these vintage gingerbread men onto old book pages, that I just happen to have stashed in the carry case. 
 I cut my little buddies out and adhered them with some matte Mod Podge applied to the back. Use a brush and a very light coat of matte Mod Podge because you run the risk of having the ink bleed through if the paper becomes too wet with the podge. 


I created a page filled with the words "Holly Jolly"in a variety of fonts. You can copy this one if you right click on the photo and save as. Print and cut and glue with Mod Podge. Try and play with layouts to get different looks. 
Using a fine thin paint brush I added some accents to the tag. You can see I used paint dots around the perimeter and I outlined the words. I also outlined the gingerbread man and some of the hearts. 
I swiped on some clear glitter paint and added some bling to add a little glitz.


In the end, they pulled together nicely. 
You can also see I tried to print out and play with a vintage Santa image but he just wasn't as sharp as my little man.


Thanks for reading along. 
Stay Jolly.


Michele 

Coastal Bohemian

Here's a list of links to Link Parties I join during the week.


Wednesday, November 15, 2017

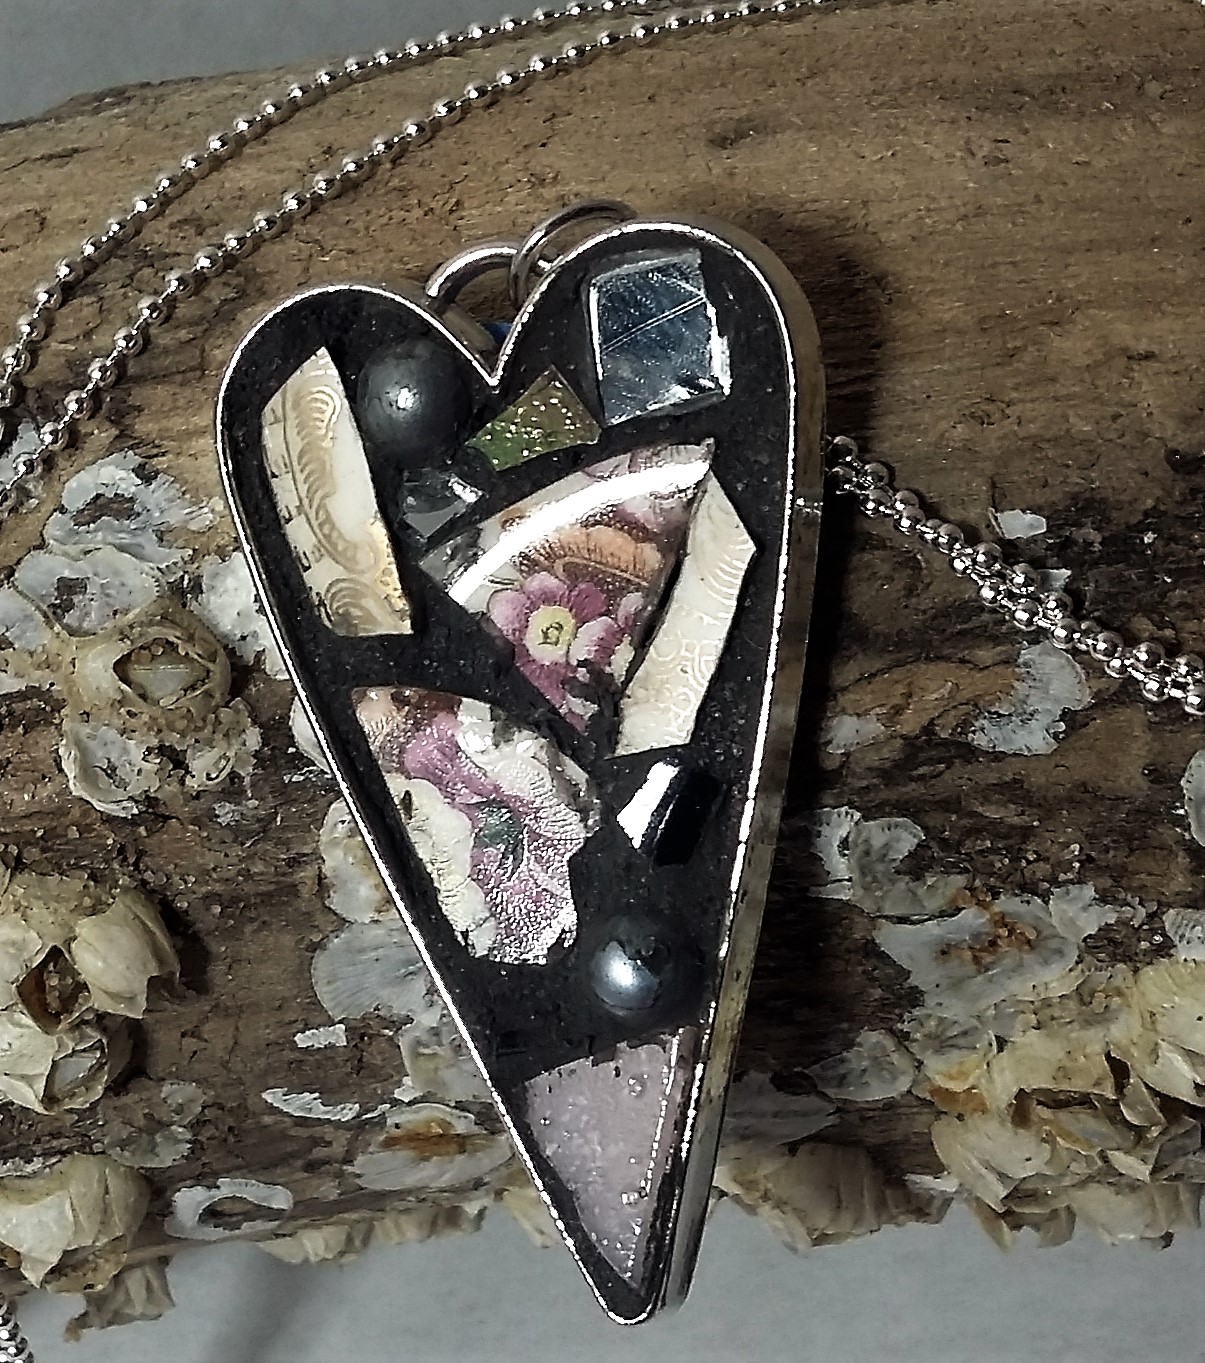
Heart Pendant Beginner's Mosaic Fear.

This month I'm bringing back the mosaic. What I mean by that, is I'm planning a mosaic class down at the studio again. Mostly and often times selfishly I choose crafts I like. Who wants to teach something they don't like? 

I love mosaics and I get excited each time I find a new one. I found this one in a subway in NYC. He's very cool.


These I happened upon just driving and hugging the shoreline in Florida one day, hence the name Coastal Bohemian. Found them at Jetty Park in Ft Pierce. I was thrilled when I saw them. 

 Playing around in the studio one day I created a simple mosaic with sand and seashells and beach glass. It's about 12" x 12" and I gave it as a gift to my mother in law. She has it prominently displayed on an easel and it's perfectly fitting since she's a Coastal Bohemian as well.


I've offered mosaic classes several times over the years but with no takers. I'm pretty sure it's because I advertise with this  scary and overwhelming picture. 


Paying attention to what people say to me in our craft classes I continue to hear, "I'm not an artist.", "I'm a beginner.", and "I'm afraid.". All fear based.  I'm guessing that's why the classes didn't take. Neon lights flashing in my face right now!

As I contemplate classes this month  I believe this mosaic heart pendant is a great way for people to begin to mosaic. It's small and unimposing.


Personally, I art  for interior design . I like to decorate or create furniture with upcycling and artsy embellishments and mosaic adds a sense of novelty, along with that funky, artsy feel.
Here's a mirror mosaic table I sold.

This is my prize possession and it's a perfect fit in our beach cottage style condo here in Myrtle Beach.

I was a beginner mosaic crafter once and I'm hoping to teach those who are interested that it's a tangible art for them as well. I get it, I'm the kinda chic who will jump right into a project, big or small, right or wrong and use the entire process as a learning experience. Apparently, not everyone is like this. OK, regroup here.

Regrouping.........
Regrouping............/////////........????????......
Regrouping.............


I'm back.


Let's start small and grow.
I here you when you say you want to learn how to mosaic and I think I have found the perfect little project.


Working with people at the studio I learn something almost everyday. 
"What have I learned today?", I find myself asking that more and more lately and there is always a response. 
As for today, I have learned to take the motte before I storm the castle.
Let's start small and grow. So we won't craft a large mosaic today , but we can create a lovely introduction to mosaics with a dainty heart shaped pendant.

Thanks for reading along. 
Here's to broken bits! 

Michele 
Your Coastal Bohemian

You can find me partying at these link parties. 


Update 12-15-17 I had the pendant mosaic class and had my first 2 students , both of whom are interested in doing a mosaic class. 


Monday, October 30, 2017

Upcycled Verdigris Garden Statues

We've all had these garden statues out in our yards over the years in different forms and sizes. Over the years they get weathered and distressed and can look a bit sad, enough so to possibly toss them into the trash. Here's a quick makeover I did for a friend recently. She was moving and I knew her mom had given her these statues and I wanted to give them a  new life. (She was considering leaving them behind because they were so ravaged by the weather.)

Grab a paper plate and add some craft acrylic paint in Copper and a few drops of water to thin it out a bit. With a very wet brush coat the entire statue.  You will see through some of the paint in striations and this really lends itself to the piece.  And if you get a few drip marks let them be. (Just a few).
We are not looking for a complete thick coverage here. Let it dry. Using a dry brush technique with some verdigris color of paint dry brush onto the areas you think would be most affected by rain and winds. Places that jut out and the upper most parts seem to be the weathered areas.  This will soften the look immediately. 
I purposely do not add protective sealants. I want the weather to soften the paint look more . We are looking for this 


Found in a google search "Copper Statue Patina"
Look at the drip marks. Yummy.


 I used Nicole's paint in Copper from AC Moore and it's a fantastic paint for this.


Quick and easy upcycle and my friend is thrilled. She made me leave the copper painted one just copper. They actually sit on her screened in patio where she meditates so they will see a lot more life and love this  go round.


Thanks again for checking things out over here at Coastal Bohemian.


Michele


This is where I post all week for link parties.

Wednesday, October 25, 2017

Worn Denim Jeans Furniture.

Think of your favorite worn in, worn out, weathered and  distressed jeans . Recolor that image with Midnight Blue from your childhood Crayola crayon box. That's what we have here.
This image does not reflect that deep, midnight blue with that hint of emerald, but I can tell you in person this color is glorious. I started by using Riptide by Chalk Country Paint.


Before video.


Here's the before picture of a piece I picked from the side of the road a few years ago. Finally, it's time to paint something for me. Yippee.

 I used a paint technique I saw on Debbie's Design Diary on Youtube that uses a two color technique, a spray bottle and a pallet knife. Not your typical. Now I have used the pallet knife to scrape furniture and drag paint. Here you use the pallet knife like a paint brush would be used to highlight or enhance an area. 

Check out Debbie's Video here. 


It begins with two coats of Riptide. Easy enough.
Next we take both Riptide, on one brush and Polished Turquoise , on another brush and begin a blending of colors. Start with the Polished turquoise on the inside of the section and swirl it on and spray it with some water. You'll need to dip into the Riptide at this point and start to blend it into the other paint . Now give this a light spray and continue to blend. Bring in your long brush strokes to create the striations, not sure if that word is what applies here but I'm using it.You're trying to get a natural color blend without creating a new color. Sort of an hombre. Debbie describes it as a blending as you would use when applying eye shadow.


After I painted the piece, I mixed together some of  the light and the dark wax and gave this whole piece a good wax and buff, further aging this table.
https://www.facebook.com/michele.michael.315/videos/vb.100000219204424/1950431198307501/?type=2&video_source=user_video_tab

Here's my after party video.


Here's where I party all week.


Thanks for reading along . 


Michele 
Coastal Bohemian

Monday, October 16, 2017

Caribbean Sea Chalky Painted Pieces


Being at the beach in South Carolina  I see many people coming down to retire from up North. They have very traditional furniture, usually dark and wood and many of these pieces are absolutely lovely pieces of furniture but they no longer define their owner. That where I come in.

I've been painting furniture for over 26 years. In the last several years I've been painting with Chalk Country Paint brand which I sell down at my studio and also, where I give chalky paint and distressed paint classes.


 These are a few pieces I painted for a couple that moved down to Myrtle beach from up North. The wife was reluctant to have the pieces painted but the husband was ready to lighten up the house. It's usually the men who don't want to paint the wood. 
Women usually need to change the look and come hunting for some chalky paint but I find the men love and connect with the look of wood and it's very difficult for them to make such a dramatic change over to painted furniture. It's  a boy thing.


We decided on Caribbean Sea Chalky Country Paint . It's a soft blue with hints of slate . It's the color I call, "Myrtle Beach Blue", because so many people choose this as their color when they decide to move into the painted furniture arena down here. 
 Caribbean Sea is a great way to bring a pop of color into the home without the shock. 


This client wanted to change the knobs and hardware but I like the painted pulls and knobs that were original to the piece and convinced them to try the painted hardware. In the end, they could always still buy new hardware if they didn't like it.


My client picked up his pieces and admitted that the distressed painted hardware looked great with the piece. Everyone was happy that day. This furniture has a new life ahead and I helped to set it on it's way. That makes me happy. God I love furniture .


Thanks for popping in to see my latest project.

Michele 
Coastal Bohemian


As a form of online networking, I participate in link parties daily. It's actually thrilling for me to learn about all these different bloggers and often times I am inspired by them in my own life and business. It's been a gift for me to participate. 
Here 's a link to where I party all week.

Monday, October 9, 2017

Halloween Blocks

These are Halloween blocks . Great for shelf sitters, gifts, hostess gifts or for your Halloween tablescape.


I have made these blocks before in a Blog post titled, Thanksgiving Blocks. I'm swapping out the info so you have info and links to make these Halloween Blocks . 

I went to Home Depot and bought some of their discounted wood , took it back to my shop and cut it to a size I thought made a nice set.  I bought 1" x 6" and 1" x 4" boards.  I did 
5" x 7" boards and 3' x 5' boards. (The boards at HD are actually milled smaller than their listed sizes so a 6 " board is actually 5.5" which was great for my publisher layout.)


I used some Fiddes Rugger Brown wax to give the wood some depth and color. Apply wax by brush , wipe off excess and then buff .


Wax.  


Buffed.

Instead of cutting the images from the paper I like to tear around the images to cut them out. I age them with the brown wax used in the same way described above. This seals in the ink so you can decoupage with out any ink bleed onto your project. The brow wax will get your edges perfectly aged and shabby looking. 

After that we decoupage the images to the wood.
 Download Halloween Images here


Add some accessories  like bows and bling for eyes. 
Done.
To me this looks like something I may find in a hometown gift boutique. I love to wrap these up with tissue paper and a small gift bag for gift giving. 


Hope you are enjoying your fall and I hope you enjoyed this craft project.


Michele 

Here's a link to where we link up all week. Just take peek.


01 09 10