


This post is part of a Valentine's Day Craft Challenge that is a collaboration with several other bloggers. Be sure and stop by and visit the other bloggers for more holiday inspiration.
Beverly | Across the Blvd
Gail | Purple Hues and Me
T'onna | Sew Crafty Crochet
Marci | Stone Cottage Adventures
Michele | Coastal Bohemian
Allyson | Southern Sunflowers
Vicky | Vicky Myers Creations
Julie | Sum of Their Stories
Years ago, I taught a painted bottle class in my art studio. I used #chalkpaint and bottles because I could teach people how easy it was to work with chalk paint , which I sold. Everyone would go home with an inexpensive, little take away.
Depending on the month of the year, I always had the perfect color #chalkpaint and coordinating vintage images from the #Graphicsfairy.

After the bottles were painted and the images decoupaged I would break out the findings and trims. This was a collection of old jewelry pieces, seashells, twine, pieces of lace and trim.
It was so much fun to see peoples' imaginations go wild with ideas for embellishments.
I have recently moved and I am looking to reopen my art studio in Gulf Breeze, Florida. In doing so, I am going to visit local businesses and organizations to see how we can work together. I like to leave a little crafty calling card and these bottles and cans make it inexpensive for me to do so.
💗
Here's what I did to put together this collection.
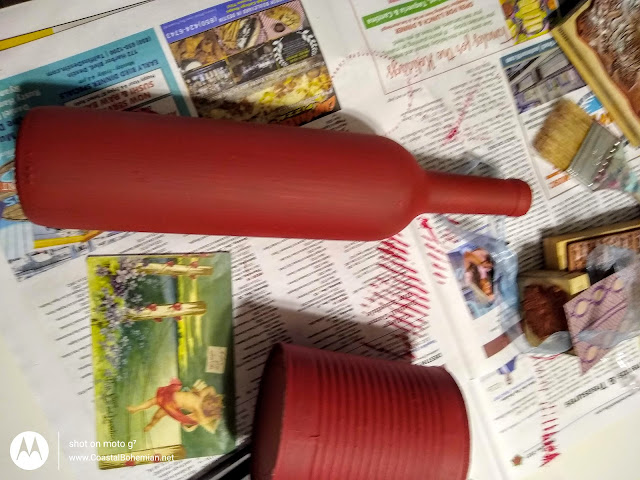
1. Gather up a few bottles and cans in assorted sizes.
2. Clean thoroughly.
3. Remove all the labels.
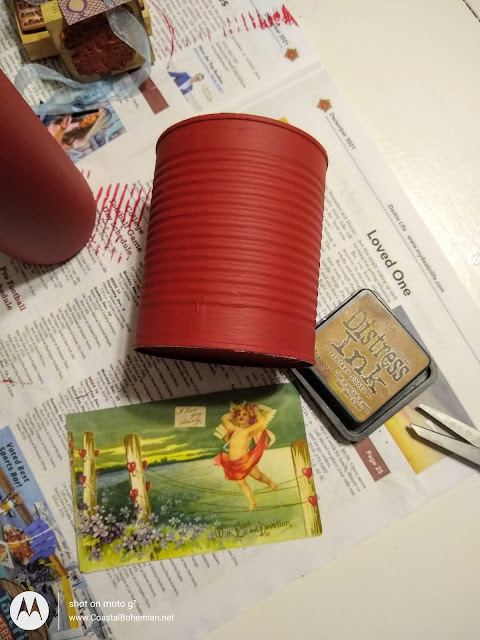
4. Paint with chalk paint and allow to dry.
Note- I made textured paint for a few pieces. This is a mix of 1/2 cup of chalk paint with 1 rounded tablespoon of baking soda.
5. Coat w/ clear or dark wax.
6. Remove excess wax and buff.
💗
7. Distress vintage images.
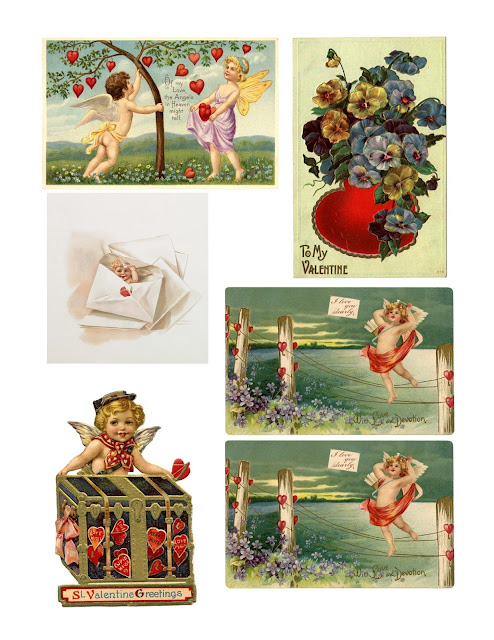
Here's a variety of images for you to print. Just rt click on the image and save. You should be able to easily print these at home.
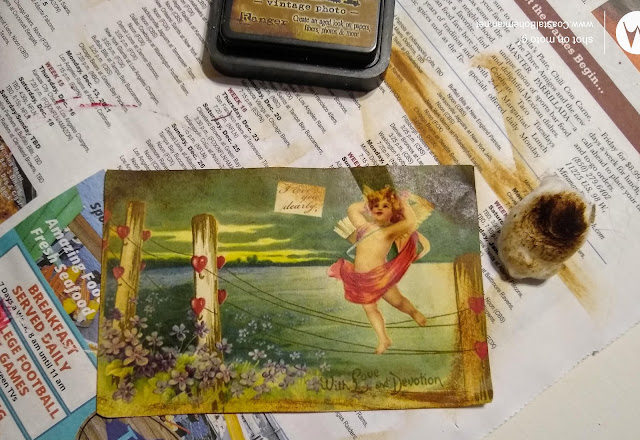
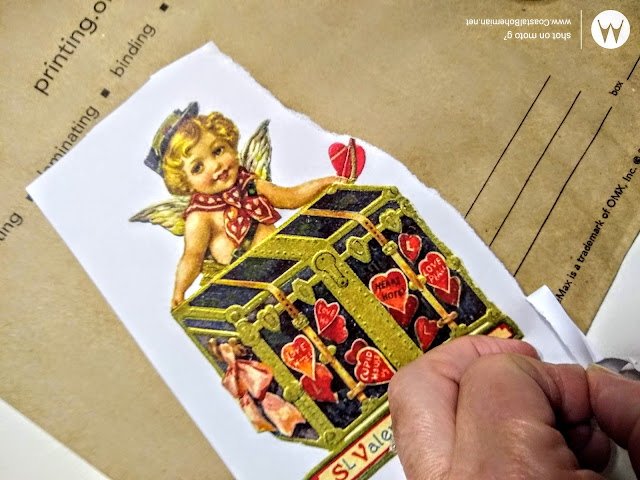
I like to tear around images to further distress, then I add some dark wax or brown ink around the edges either using a brush or in this case, I used a cotton ball to add dark brown ink around the edges.
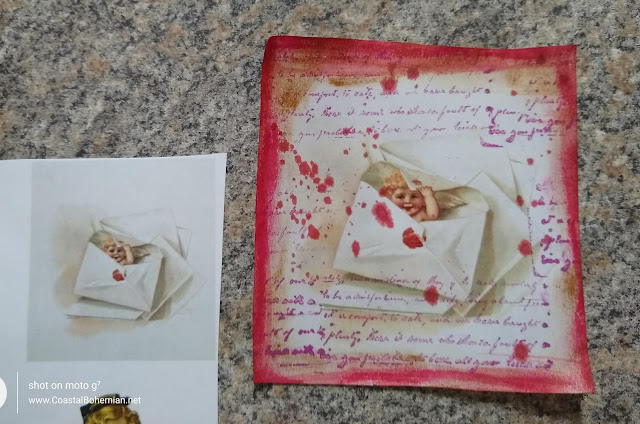
This label was distressed using dark ink applied to the edges, it was splattered with some pink ink , stamped with wording using a fuschia colored permanent ink, and softened around the edges with red pastel smudges.
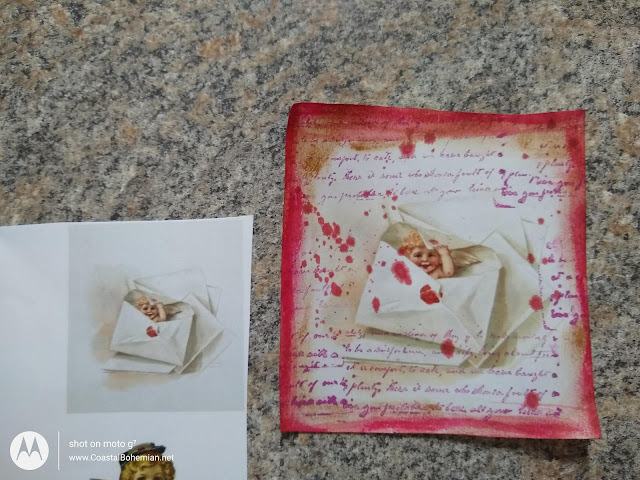
Look at the before and after of this image.
💗
8. Decoupage vintage images to bottles or cans.
Pro tip- Use a piece of plastic wrap to help adhere your decoupage image to the bottle. Here's how it works. Flip your image over and coat the back with mod podge. Position it and place it on the bottle. Quickly grab the plastic wrap and place it over the image on the bottle. Carefully smooth the image into place using your fingers patting and smoothing gently. This helps to avoid tears in the paper. Be careful not to pick up any glue and get it on to the front of the image. You'll see that you can easy smooth most wrinkles using this method.
💗
9. Embellish using shiny bits, laces and trims.
💗
Gathered together these would make a perfect grouping . The display is colorful and happy. It looks a little artsy and with the mix of textures and variety, is truly eye candy.


How sweet to make a few to start your seeds.
Remember to click over to visit the other Valentine blog posts.
Beverly | Across the Blvd
Gail | Purple Hues and Me
T'onna | Sew Crafty Crochet
Marci | Stone Cottage Adventures
Michele | Coastal Bohemian
Allyson | Southern Sunflowers
Vicky | Vicky Myers Creations
Julie | Sum of Their Stories
With love and gratitude,
Michele

Find me partying here all week, at these link parties, with some great bloggers.
Follow us out on Facebook, Pinterest , Instagram, Linkedin, or Bloglovin .
These are so sweet. I especially like the idea of tins for seeds, they'd make a perfect little gift.
ReplyDeleteThank you.
DeleteWhat a fun way to make little introduction gifts for the community, Michele! So many wonderful upcycle possibilities! I'm sure the businesses would love having an art studio like yours in their area!
ReplyDeleteHi Gail. I am hoping. 😁
DeleteNice, and thanks for the tip using plastic wrap, so handy!
ReplyDeleteYou are going to love that plastic wrap tip. I have use it on many things with edges and grooves.
DeleteSuch a cute and clever idea! I love how you distressed the pictures. And I love that you're going to plant seeds in them. This would be a good gift for my hubby. He loves growing plants and herbs.
ReplyDeleteThe seeds are planted and coming up. So excited. I think your husband would love it.
ReplyDeleteI love the combination of pink and red for the bottle and cans. It's such a great idea to use these as your "calling card" to introduce yourself and your business.
ReplyDeleteHi Beverly. Thanks I think so too.
DeleteWhat a transformation! Thank you for the tip about plastic wrap. Sometimes, when I decoupage, there seems to be more glue on me than on the project! LOL! pinning -Marci @ Stone Cottage Adventures
ReplyDeleteThe plastic wrap tip is so great. Let me know when you try it.
DeleteThose vintage prints look so good used on your bottles and cans. Distressing the prints really adds to your overall designs. I've never tried the distress ink before. Wonderful craft idea for Valentine's Day!
ReplyDeleteHi Allyson. I love the distress inks. You will too. Great for fabric as well.
DeleteHi Allyson. Thank you. I love paper crafting and there is a lot of distressing of papers if you prefer vintage styles.
ReplyDeleteYour chalk paint and vintage pictures go together beautifully! Thanks for sharing at the Friday with Friends link party.
ReplyDeleteRachelle
Hi Rachelle Thank you.
DeleteHard to believe it's time to get ready for Valentine's Day! I like the vintage look of these painted bottles and cans. A fun and economical craft to create unique Valentine's decor. I always enjoy working with chalk paint.
ReplyDeleteHi Carol. Yes the chalk paint makes these easy.
DeleteI love a good recycling project and these are a great idea. Especially the cans for the seed starters. Thanks for linking up and sharing this week. #HomeMattersParty
ReplyDeleteHi Donna Thank you.
DeleteThese are very cute and easy on the budget too. I love upcycling bottls. Thanks for sharing at #omhgww. See you next week. Pinned.
ReplyDeletelooks super cute after the finishing touch. I love the colors too. Thanks for sharing it and happy to have you here in #OMHGWW
ReplyDeleteThank you.
Delete